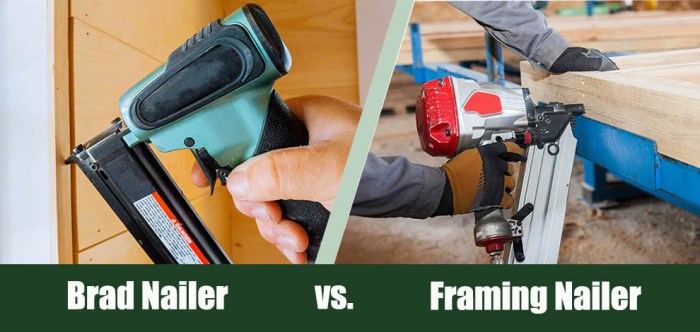
Framing nailer vs roofing nailer: Choosing the right tool for the job is crucial for any DIY enthusiast or professional contractor. This in-depth comparison dives into the key differences between these essential power tools, highlighting their unique features, uses, and maintenance needs. Understanding the nuances of each will help you make informed decisions, ensuring optimal performance and safety.
From the power source and nailing capacity to the ergonomic design and safety precautions, this guide will equip you with the knowledge to confidently select the ideal nailer for your specific project. Learn about the best applications for each type and avoid costly mistakes.
Introduction to Framing and Roofing Nailers
Framing and roofing nailers are essential power tools for construction work. They automate the process of fastening nails, significantly increasing efficiency and reducing the risk of injury compared to manual hammering. Understanding the differences between framing and roofing nailers is crucial for selecting the right tool for the job. These differences lie in their design, power requirements, and the specific types of applications they are best suited for.These specialized nailers are designed to handle different types of materials and fastening needs, tailoring their function to the respective construction phases.
Roofing nailers, for example, often feature specialized tips and mechanisms to accommodate the unique demands of attaching roofing materials.
Purpose and Function of Framing Nailers
Framing nailers are designed for driving nails into wood framing members, creating the structural support for walls, floors, and roofs. They are commonly used in residential and commercial construction projects. The nails used are typically heavier-duty and longer to hold the framing members together securely. A key feature of framing nailers is their ability to drive nails through multiple layers of wood, critical in construction where several layers are common.
Purpose and Function of Roofing Nailers
Roofing nailers are designed for driving nails into roofing materials, such as shingles, tiles, and metal panels. They are designed to work with a variety of roofing materials, from asphalt shingles to metal roofing. The nailers are often equipped with specialized tips to ensure proper nail placement and prevent damage to the roofing materials. The nails used are often smaller and designed for the lighter-duty demands of roofing.
Key Differences in Design and Construction
The primary difference between framing and roofing nailers lies in their power requirements, the types of nails they can handle, and their design to accommodate specific material thicknesses. Framing nailers typically have more robust construction and higher power output to handle heavier-duty work. Roofing nailers often have a more compact design to accommodate the more precise work needed for roofing materials, which can be lighter and thinner.
The nailer’s ability to drive nails accurately and consistently is a crucial factor in the tool’s effectiveness and longevity.
Comparison of Framing and Roofing Nailers
| Type | Material | Use Case | Key Features |
|---|---|---|---|
| Framing Nailer | Wood framing members, plywood, OSB | Attaching studs, rafters, joists, and other framing components | Higher power output, stronger construction, longer nails, ability to drive nails through multiple layers of wood. |
| Roofing Nailer | Shingles, tiles, metal roofing, etc. | Fastening roofing materials to the roof deck | Specialized tips for different roofing materials, compact design, often uses smaller, lighter nails, and designed for consistent and precise nail placement. |
Key Features and Specifications
Framing and roofing nailers, while both serving the purpose of fastening materials, have distinct characteristics tailored to their specific applications. Understanding these differences is crucial for selecting the right tool for the job, ensuring efficiency and preventing damage. This section delves into the key features and specifications that distinguish these two types of nailers.Choosing the correct nailer depends on the type and size of the nails needed, the material being fastened, and the frequency of use.
Understanding these factors helps avoid frustration and potential damage during the job.
Power Source and Capacity
Framing nailers, frequently used for heavy-duty applications, often rely on compressed air for power. This allows for consistent and forceful driving of large-diameter nails into various materials. Roofing nailers, on the other hand, often use battery power for portability and reduced noise pollution. This is particularly useful in environments where noise levels are restricted. Battery-powered nailers often feature a lower nailing capacity compared to air-powered models, but their convenience and quiet operation make them desirable for many tasks.
Nailing Capacity
The nailing capacity is a critical distinction between framing and roofing nailers. Framing nailers are designed to handle larger nails and greater volumes of work, often with a greater maximum nail size. They are equipped to drive nails into thicker materials, like lumber and plywood, with significant force. Roofing nailers, optimized for smaller, faster fastening jobs, are capable of handling smaller nails and a broader range of nail types.
Choosing between a framing nailer and a roofing nailer depends on the job, but understanding the differences is key. For example, if you’re looking to renovate or build a new house, exploring options like houses for sale in sweden might reveal diverse needs. Ultimately, the right nailer selection is crucial for efficient and safe construction, regardless of the project.
Proper tool selection is paramount for the best results.
This capability is often essential for roofing applications, where the goal is precise placement of smaller fasteners.
Ergonomic Design and User Comfort
Framing nailers often prioritize durability and strength over extreme comfort features. Their design emphasizes power delivery and often requires a more forceful grip. Roofing nailers, recognizing the need for prolonged use in often uncomfortable conditions, frequently incorporate ergonomic designs and user-comfort features, such as soft-grip handles, lightweight construction, and balanced designs. This enhances the user experience and reduces fatigue, especially during extended use.
Choosing between a framing nailer and a roofing nailer hinges on the job at hand. While both drive nails, different applications require different tools. For instance, if you’re looking for a method to effectively crush pecans without a food processor, you might consider a hammer and a sturdy surface. A crucial factor in choosing the right nailer, whether for a delicate framing project or a robust roofing job, is understanding the specific task and the appropriate tool for the task.
Refer to how to crush pecans without food processor for a unique approach to tackling nuts. Ultimately, the correct nailer selection is critical for efficient and safe work.
Popular Models and Specifications
Several well-known brands offer both framing and roofing nailers, catering to various budgets and needs. A few examples include:
- DeWalt: Known for their durable and powerful framing nailers, models like the DW2020 and DW2030 offer robust performance.
- Bosch: Bosch models, like the PNA180, are renowned for their efficiency and user-friendly design in roofing nailers.
- Milwaukee: Their framing nailers are noted for their powerful air-driven systems, while their battery-powered roofing nailers provide an alternative for specific tasks.
Comparison Table
The table below provides a concise overview of key specifications for selected framing and roofing nailer models.
| Model | Brand | Power Source | Max Nail Size (Gauge/Length) | Weight (lbs) | Typical Application |
|---|---|---|---|---|---|
| DW2030 | DeWalt | Air | 18 Gauge, 2-1/2″ | 8 | Framing |
| PNA180 | Bosch | Battery | 18 Gauge, 1-5/8″ | 5 | Roofing |
| M18 | Milwaukee | Battery | 18 Gauge, 1-1/2″ | 6 | Roofing |
Note that specifications may vary slightly depending on specific model variants and regional availability.
Operational Differences and Procedures
Operating framing and roofing nailers safely and effectively requires understanding their distinct operational characteristics. Knowing the procedures for loading nails, adjusting settings, and applying the correct pressure for different materials is crucial for achieving optimal results and preventing damage or injury. Different nailers require different approaches to maximize efficiency and minimize the risk of mistakes.Proper nailing procedures not only enhance the quality of the work but also significantly reduce the risk of accidents.
This section delves into the specifics of operating both framing and roofing nailers, highlighting key differences in procedures and safety precautions.
Operating Procedures for Framing Nailers
Framing nailers are designed for driving long, heavy-duty nails into wood and other structural materials. Understanding the specific procedures for using these tools ensures that nails are driven precisely and effectively, with minimal effort and risk.
- Preparing the Nailer: Ensure the nailer is properly charged and has a sufficient supply of compressed air. Check for any obstructions or debris that might impede the nailer’s operation. Inspect the nailer’s mechanism for any signs of damage or wear. Inspect the nail magazine for any foreign objects.
- Loading Nails: Framing nailers typically use a magazine-style loading system. Insert the correct size and type of nails into the magazine, ensuring the nails are oriented correctly and are not bent or damaged. Overfilling the magazine can lead to jamming and decreased efficiency.
- Adjusting Settings: Accurate adjustment of the nailing depth and force is critical. Use the nailer’s depth adjustment mechanism to set the appropriate depth for the specific application. Overdriving nails can cause damage to the material and compromise structural integrity. Adjust the force according to the type of wood and the length of the nail.
- Nailing Procedure: Position the nailer firmly against the workpiece, ensuring a straight and stable grip. Apply even pressure to drive the nail accurately. Avoid applying excessive force, as this can lead to bent nails or material damage. Maintain a consistent nailing rhythm to prevent fatigue and maintain accuracy.
Operating Procedures for Roofing Nailers, Framing nailer vs roofing nailer
Roofing nailers are specifically designed for driving nails into roofing materials like shingles, asphalt, and metal. Their features are optimized for the unique demands of roofing applications.
- Preparing the Nailer: Ensure the nailer is properly charged and has the correct type of roofing nails. Inspect the nail magazine to ensure it is free of debris and foreign objects. Verify that the nailer is set to the appropriate nailing depth and force.
- Loading Nails: Roofing nailers often use a magazine or a direct-feed system for loading nails. Ensure the nails are the correct size and type for the roofing material. Overfilling the magazine can result in poor nailing performance.
- Adjusting Settings: Roofing nailers typically offer settings for nailing depth and force. The nailing depth should be adjusted based on the thickness of the roofing material and the type of nail being used. Adjust the force according to the specific type of roofing material.
- Nailing Procedure: Position the nailer firmly against the roofing material, applying even pressure to drive the nail. Maintain a consistent nailing rhythm. Avoid excessive force, which can damage the roofing material. Ensure the nail is fully seated in the roofing material.
Pressure and Material Considerations
Different materials require varying levels of operating pressure to achieve optimal nailing results. Excessively high or low pressure can negatively affect the quality of the work and the integrity of the material.
| Material | Framing Nailer Pressure | Roofing Nailer Pressure |
|---|---|---|
| Softwood | Medium | Low |
| Hardwood | High | Medium |
| Metal Roofing | High | High |
Excessive pressure can lead to bending or breaking the nail or damaging the material. Proper nailing pressure is crucial for both aesthetic and structural integrity.
Safety Considerations
Safety is paramount when using framing and roofing nailers. Adhering to safety protocols minimizes the risk of accidents and injuries.
- Wear appropriate safety gear: Always wear safety glasses, gloves, and appropriate footwear. Protective clothing is essential for minimizing the risk of injury.
- Maintain a clear workspace: Ensure the work area is clear of obstructions and clutter to prevent tripping or accidents.
- Inspect tools regularly: Regularly check the nailer for any signs of damage or wear. Replace damaged or worn parts immediately.
- Follow manufacturer instructions: Always adhere to the manufacturer’s instructions for operating the nailer and maintaining the safety of the nailer.
Maintenance and Troubleshooting
Keeping your framing and roofing nailers in tip-top shape is crucial for consistent performance and safety. Proper maintenance prevents costly repairs and ensures the tools last longer. This section details the essential steps for maintaining both types of nailers, addressing common problems, and outlining the part replacement process.Regular maintenance isn’t just about keeping your tools looking good; it’s about preventing costly breakdowns and ensuring your work is done efficiently and safely.
By following the Artikeld procedures, you’ll avoid frustrating delays and keep your nailers functioning optimally for years to come.
Cleaning Procedures
Regular cleaning is fundamental to nailer maintenance. Accumulated sawdust, debris, and construction dust can hinder performance and lead to malfunctions. Different cleaning methods are required for different parts of the nailer. For example, the magazine and the nailer’s body may require different cleaning methods.
- Disassemble the nailer following the manufacturer’s instructions. This allows for a thorough cleaning of all components.
- Use compressed air or a brush to remove any loose debris. This will help to prevent clogs and ensure proper functionality.
- For stubborn grime or sawdust, use a damp cloth or a mild detergent solution, taking care not to damage any electrical components. Thoroughly dry all parts before reassembly.
Lubrication
Lubrication is essential for smooth operation and extends the life of your nailer. This is especially true for the moving parts, like the mechanisms responsible for feeding nails and driving them.
- Use the recommended lubricant specified by the manufacturer. Incorrect lubrication can damage the tool or compromise performance.
- Apply a thin film of lubricant to the designated lubrication points. Refer to the user manual for specific instructions.
- Over-lubrication can be as detrimental as under-lubrication. Follow the instructions carefully to achieve optimal results.
Common Issues and Troubleshooting
Nailers can encounter various issues, ranging from simple clogs to more complex problems. Addressing these issues promptly can prevent more serious problems and keep your workflow moving smoothly.
- Jammed Magazine: If the nailer’s magazine jams, first check the magazine for any obstructions. Remove the jam, clean the area, and ensure the magazine is properly seated.
- Nail Feeding Problems: If the nailer isn’t feeding nails correctly, ensure the nail magazine is loaded properly and that the nail type is compatible with the nailer. Inspect the feeding mechanism for any obstructions.
- Weak Driving Force: A weak driving force could be due to low battery levels, insufficient air pressure (in pneumatic models), or a jammed mechanism. Check the power source and ensure proper air pressure. If the problem persists, consult the user manual.
Part Replacement
Replacing worn or damaged parts is essential for optimal nailer performance. Parts that fail or wear out can lead to inefficiency and safety hazards.
- Consult the manufacturer’s instructions for the correct procedure. Improper replacement can lead to further damage.
- Use only genuine replacement parts for the best performance and compatibility. This ensures proper functioning and avoids potential hazards.
- Always replace worn-out components to maintain the safety and reliability of the tool. This is a preventive measure to maintain optimal performance.
Maintenance Schedule
Regular maintenance is crucial for maintaining optimal performance and safety. A well-maintained nailer will reduce the risk of accidents and ensure consistent, efficient operation.
| Nailer Type | Maintenance Task | Frequency | Troubleshooting Steps |
|---|---|---|---|
| Framing | Cleaning magazine and mechanism | After every 100 nails | Check for obstructions and ensure proper seating. |
| Framing | Lubricating moving parts | Every 500 nails | Apply a thin film of lubricant to designated points. |
| Roofing | Cleaning magazine and mechanism | After every 200 nails | Check for obstructions and ensure proper seating. |
| Roofing | Inspecting nailer components | Every 1000 nails | Look for any signs of wear or damage. |
Conclusion
In conclusion, the framing nailer vs roofing nailer debate boils down to understanding your specific needs. While both serve the purpose of fastening materials, their design, power, and applications differ significantly. By considering the factors Artikeld in this comprehensive guide, you’ll be well-equipped to choose the right nailer for your project, maximizing efficiency and ensuring a professional finish.
Remember, proper safety precautions are paramount when using power tools, and this guide emphasizes their importance.
Answers to Common Questions: Framing Nailer Vs Roofing Nailer
What are the most common mistakes people make when choosing between a framing and roofing nailer?
Failing to consider the specific material being nailed and the required fastening depth are common mistakes. Also, neglecting to check the nailing capacity of the tool for the specific nail type is a crucial oversight. Using the wrong nailer for a particular application can lead to poor results and potential damage.
How do I determine the right nailing capacity for my project?
Consider the thickness and type of wood you’ll be working with. A nailer with insufficient capacity might not drive nails properly, while one with excessive capacity might be overkill and potentially damage the material. Consult the specifications of the nailer and the nails to ensure compatibility.
What safety precautions should I take when operating a framing or roofing nailer?
Always wear safety glasses and appropriate hearing protection. Ensure a clear workspace, and keep bystanders at a safe distance. Follow the manufacturer’s instructions carefully, and be mindful of potential hazards associated with the operation of the tool.
