Chevy Silverado bank 2 sensor 2 malfunctions can lead to significant performance issues. This comprehensive guide delves into the intricacies of this crucial engine component, offering a detailed analysis of its function, common symptoms, potential causes, diagnostic procedures, repair strategies, and preventative maintenance tips. Understanding the sensor’s role within the overall engine operation is key to effectively troubleshooting and resolving any problems.
The Chevy Silverado bank 2 sensor 2, a critical component in the vehicle’s engine management system, monitors critical emissions and air-fuel mixture. Its precise readings are essential for optimal engine performance and fuel efficiency. Malfunctions can result in a variety of symptoms, ranging from minor performance issues to more serious engine problems.
Introduction to the Chevy Silverado Bank 2 Sensor 2
The Chevy Silverado Bank 2 Sensor 2, a critical component in the vehicle’s engine management system, plays a vital role in maintaining optimal engine performance and emissions. This sensor, situated within the engine’s exhaust system, monitors specific parameters related to the combustion process. Understanding its function and location is essential for diagnosing and resolving potential engine issues.The function of the Bank 2 Sensor 2 is to accurately measure the oxygen content in the exhaust stream of the corresponding cylinder bank.
This data is crucial for the engine control module (ECM) to adjust the fuel-air mixture for efficient combustion and emissions control. Precise oxygen readings enable the ECM to maintain ideal air-fuel ratios, leading to better fuel economy and reduced harmful emissions.
Sensor Location and Role in Engine Operation
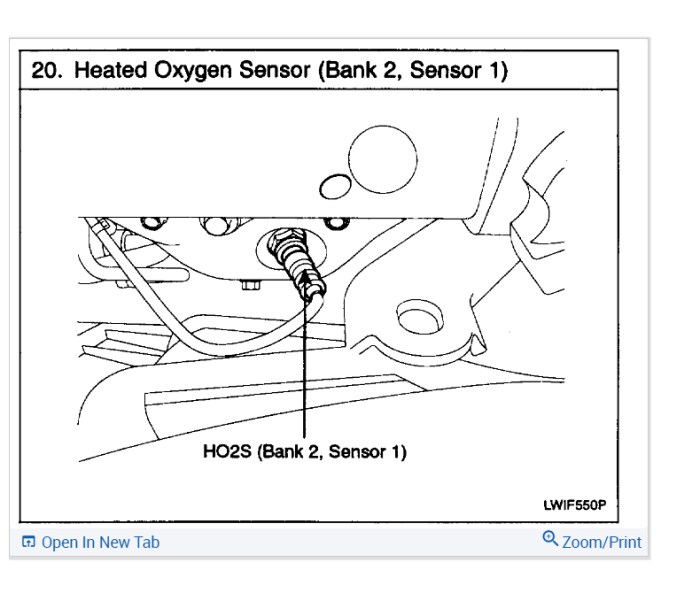
The Bank 2 Sensor 2 is typically located on the exhaust manifold, downstream from the catalytic converter in the second bank of cylinders. Its strategic placement allows for the collection of representative exhaust gas data for this specific cylinder bank. This data, alongside information from other sensors, helps the engine control module (ECM) maintain precise control over the combustion process.The sensor’s role in the overall engine operation is multifaceted.
It acts as a feedback mechanism for the ECM, providing real-time data on the effectiveness of the fuel injection and ignition timing. This allows the ECM to dynamically adjust the fuel delivery and spark timing for optimal combustion and efficiency. Consequently, the sensor contributes to the overall efficiency, performance, and emissions compliance of the engine.
Operational Parameters
The Bank 2 Sensor 2 measures the oxygen concentration in the exhaust gas. The readings are crucial for the engine control module (ECM) to determine the effectiveness of the fuel-air mixture in each cylinder. This measurement allows the ECM to precisely adjust fuel delivery, optimizing the combustion process.
Troubleshooting and Maintenance
Proper maintenance of the Bank 2 Sensor 2 is crucial for ensuring accurate readings and optimal engine performance. Regular inspections, particularly for signs of damage or contamination, are vital. If the sensor is damaged or malfunctioning, it can lead to incorrect fuel-air mixture adjustments, resulting in reduced fuel efficiency, increased emissions, and potential engine damage. Consult a qualified mechanic for any issues concerning this sensor.
Symptoms of Sensor Malfunction
The Chevy Silverado Bank 2 Sensor 2, crucial for precise engine operation, can exhibit various symptoms when malfunctioning. Understanding these symptoms is vital for prompt diagnosis and effective repair. These indicators can range from subtle performance issues to more pronounced engine problems, demanding careful attention from the vehicle owner.Engine performance is intricately linked to the accuracy of sensor readings.
A malfunctioning sensor can disrupt this balance, leading to a cascade of symptoms that affect the overall drivability and reliability of the vehicle. Identifying these symptoms and their potential causes is key to ensuring prompt and effective repairs.
Common Symptoms
Understanding the diverse symptoms associated with a malfunctioning Bank 2 Sensor 2 is critical for timely intervention. These symptoms can vary in severity, ranging from minor inconveniences to potentially dangerous situations. Early identification is key to preventing further damage to the engine.
- Reduced Engine Power: A noticeable decrease in acceleration and overall power output is a common symptom. The engine may struggle to maintain speed or climb hills, and the vehicle may feel sluggish or underpowered. This symptom can indicate a range of issues, including the sensor’s failure to provide accurate air/fuel ratio data to the engine control module (ECM).
- Rough Idling: An unstable or rough idle can be a sign of a problem with the sensor. The engine may vibrate or sputter while idling, which can be uncomfortable and potentially indicate a significant problem. This can be attributed to inaccurate signals about the oxygen content in the exhaust, affecting the engine’s ability to regulate its fuel delivery.
- Check Engine Light Illumination: The most apparent symptom is the illumination of the Check Engine Light (CEL). This signifies a detected fault within the vehicle’s system. The specific code displayed on a diagnostic tool will provide further information about the nature of the issue and can pinpoint the Bank 2 Sensor 2 as the culprit.
- Poor Fuel Economy: A noticeable drop in fuel efficiency is another common symptom. The engine’s inability to optimize fuel combustion due to the faulty sensor can lead to significant fuel consumption, resulting in increased costs for fuel and reduced overall range.
- Erratic Acceleration: Intermittent or erratic acceleration patterns can also be indicators of a malfunctioning sensor. The vehicle may accelerate inconsistently or experience sudden surges or stalls, causing a dangerous and unpredictable driving experience. This inconsistency stems from the sensor’s inability to accurately provide feedback about the oxygen levels in the exhaust, making it difficult for the engine to maintain optimal fuel delivery.
Specific Error Codes
Specific diagnostic trouble codes (DTCs) can offer crucial insights into the source of the problem. These codes are generated by the vehicle’s onboard computer and provide a precise indication of the malfunctioning component. Understanding these codes is vital for accurate diagnosis and repair.
- P0135: This code indicates a problem with the Bank 2 Sensor 2’s heating element or its ability to provide accurate oxygen readings, potentially affecting the engine’s ability to adjust the air/fuel ratio effectively.
- P0136: This code signifies a malfunction in the Bank 2 Sensor 2’s signal output. The signal from the sensor might be inconsistent or unreliable, leading to difficulties in maintaining precise engine control.
- P0155: This code often relates to a problem with the Bank 2 Sensor 2’s electrical connections or wiring, causing the signal to be corrupted or unreliable.
Symptom Severity Comparison
The severity of symptoms associated with a malfunctioning Bank 2 Sensor 2 can vary significantly. This table illustrates a comparative analysis of symptom severity, possible causes, and potential implications.
| Symptom | Severity | Possible Cause |
|---|---|---|
| Reduced Engine Power | Moderate | Faulty sensor readings, affecting fuel delivery |
| Rough Idling | Moderate | Inaccurate oxygen sensor readings, impacting combustion efficiency |
| Check Engine Light Illumination (P0135/P0136/P0155) | Moderate to High | Sensor malfunction, wiring problems, or heating element issues |
| Poor Fuel Economy | Moderate | Inaccurate air/fuel ratio, resulting in inefficient combustion |
| Erratic Acceleration | High | Sensor signal inconsistency, potentially causing sudden surges or stalls |
Causes of Sensor Failure
The Chevy Silverado Bank 2 Sensor 2, crucial for precise engine performance, can malfunction due to various factors. Understanding these causes is essential for proactive maintenance and avoiding costly repairs. A faulty sensor can lead to inefficient fuel combustion, reduced power output, and even engine damage. Identifying the root cause is the first step towards effective troubleshooting.Several factors contribute to the deterioration of the sensor’s performance, including gradual wear and tear, exposure to harsh environmental conditions, and potential physical damage.
Addressing these factors can significantly extend the sensor’s lifespan and prevent costly replacements.
Wear and Tear
The Bank 2 Sensor 2, like any component, experiences wear and tear over time. Repeated exposure to high temperatures and vibrations, coupled with the chemical reactions within the engine, can gradually degrade the sensor’s internal components. This degradation can lead to inaccurate readings, eventually resulting in a malfunction. Routine maintenance, such as replacing worn components or addressing potential issues in a timely manner, can mitigate this problem.
Environmental Conditions
Extreme temperatures, exposure to moisture, and corrosive substances can significantly impact the sensor’s performance. For example, prolonged exposure to excessive heat can damage the internal circuitry, while moisture can lead to corrosion and electrical malfunctions. Operating the vehicle in dusty or excessively dirty environments can also contribute to sensor failure. Regular inspections and proper sealing can help protect the sensor from these environmental factors.
Figuring out Chevy Silverado bank 2 sensor 2 issues? Sometimes, the solution lies in the unexpected. Consider the space you need for your important documents, like your car repair records. Knowing the right bank safe deposit box sizes is key to proper storage, just like getting the right sensor readings is key to diagnosing your vehicle’s issues.
This comprehensive guide on bank safe deposit box sizes might even spark a fresh perspective on your Silverado’s problem. Ultimately, understanding the nuances of both your car’s sensors and secure storage solutions can lead you to a better understanding of your Chevy Silverado bank 2 sensor 2 issue.
Physical Damage
Physical impacts or collisions can directly damage the sensor’s housing or internal components. This damage can manifest as a sudden malfunction or gradual deterioration in performance. For example, a minor fender bender could potentially damage the sensor if it’s situated near the impact zone. Careful driving habits and proper maintenance procedures can help prevent such incidents.
Importance of Maintenance
Proper maintenance plays a pivotal role in preventing sensor failure. Regular engine checks, including inspections of the sensor’s wiring and connections, can help identify and address potential issues early on. Replacing the sensor according to the manufacturer’s recommendations is crucial for optimal performance and longevity. These preventative measures can often save significant repair costs in the long run.
Possible Causes and Frequency
| Cause | Frequency | Description |
|---|---|---|
| Wear and tear | High | Gradual degradation of internal components due to usage and environmental factors. |
| Environmental factors (moisture, extreme temperatures) | Medium | Corrosion and damage to the sensor due to harsh conditions. |
| Physical damage (collisions) | Low | Sudden failure due to impact or forceful external pressure. |
| Electrical issues (wiring problems) | Medium | Malfunction due to loose connections or damage to wiring. |
| Fuel quality | Low to Medium | Poor fuel quality can affect sensor readings over time. |
Regular maintenance and careful driving habits significantly reduce the risk of sensor failure.
Diagnostic Procedures
Proper diagnosis of a Bank 2 Sensor 2 malfunction in a Chevy Silverado requires a systematic approach. Skipping steps or overlooking potential issues can lead to wasted time and unnecessary repairs. A thorough understanding of the diagnostic process, including the use of diagnostic tools and proper testing procedures, is crucial for accurate identification of the problem. Visual inspection is an essential first step, followed by more advanced testing to isolate the specific cause of the sensor failure.
Using Diagnostic Tools
Diagnostic tools, such as scan tools or code readers, provide crucial information about the vehicle’s systems. These tools can retrieve stored diagnostic trouble codes (DTCs) that pinpoint the malfunctioning component. Understanding the specific DTCs associated with Bank 2 Sensor 2 issues is essential for guiding the diagnostic process. Scan tools can also display real-time data streams, allowing monitoring of sensor readings during various operating conditions.
This real-time data helps determine if the sensor is functioning correctly under different loads and speeds.
Interpreting Diagnostic Trouble Codes (DTCs)
Specific DTCs related to Bank 2 Sensor 2 malfunctions provide valuable clues about the nature of the problem. Carefully reviewing the code descriptions and associated sensor readings can help narrow down the possible causes. For example, a code related to a low sensor voltage reading might indicate a faulty sensor or a wiring issue. A code related to a high sensor voltage reading might suggest a sensor malfunction or a wiring issue.
A comprehensive understanding of the specific DTCs is necessary to accurately diagnose the problem.
Visual Inspection Procedure
A thorough visual inspection of the Bank 2 Sensor 2 is a critical first step in the diagnostic process. This visual inspection can identify obvious physical damage, such as broken wires, corrosion, or loose connections. A step-by-step procedure for a visual inspection is Artikeld below:
- Locate the Bank 2 Sensor 2: Carefully refer to the vehicle’s wiring diagram and locate the sensor’s physical position. This usually involves examining the exhaust manifold or the exhaust pipe system.
- Examine the sensor for physical damage: Inspect the sensor for any signs of physical damage, such as cracks, breaks, or corrosion on the sensor’s housing or wires. Look for any signs of physical impact, which might affect the sensor’s functionality.
- Inspect wiring and connections: Check the wiring harness connected to the sensor for any signs of damage, fraying, or loose connections. Inspect the connector for signs of damage or corrosion.
- Examine the surrounding area: Look for any debris, dirt, or other obstructions that might be impeding the sensor’s proper function. This includes checking for obstructions in the exhaust system that might affect the sensor’s reading.
- Document findings: Record any observed damage or issues during the visual inspection. This documentation is essential for troubleshooting and communication with technicians.
Importance of Proper Testing Procedures
Proper testing procedures are crucial for accurate diagnosis. Skipping steps or using improper methods can lead to inaccurate results and incorrect conclusions. Following established testing procedures ensures that the sensor’s performance is evaluated under various operating conditions. This includes simulating different driving scenarios and exhaust temperatures to see how the sensor reacts. A structured approach ensures that all potential causes are investigated thoroughly.
Repair and Replacement Strategies
Properly diagnosing and resolving a malfunctioning Bank 2 Sensor 2 requires a methodical approach. This section details the necessary steps for repair and replacement, emphasizing safety procedures and cost estimations. A thorough understanding of these procedures is crucial for a successful repair, minimizing potential damage and ensuring the safety of the technician and vehicle.Effective repair and replacement strategies for the Bank 2 Sensor 2 involve a systematic approach to ensure accuracy and efficiency.
This includes careful disconnection and reconnection of electrical components, precise part installation, and verification of proper functionality after the repair. Adherence to these strategies reduces the risk of further damage and ensures a lasting fix.
Repair Methods
Several methods are available for repairing or replacing the Bank 2 Sensor 2. Direct replacement is often the most efficient solution, especially when the sensor is severely damaged. However, in some cases, a partial repair may be feasible, such as cleaning the sensor connector or replacing a faulty wire. The best method depends on the extent of the damage and the technician’s expertise.
Tools and Parts Required
The tools and parts necessary for a repair or replacement vary depending on the method chosen. For a direct replacement, the required parts include a new Bank 2 Sensor 2 and any necessary gaskets or seals. Tools such as a socket set, ratchet, and torque wrench are essential for disassembling and reassembling the affected components. Specialized tools, such as a multimeter, may also be required for verifying electrical connections.
Safe Disconnection and Reconnection of Electrical Connections
Properly disconnecting and reconnecting electrical connections is critical for preventing electrical damage and ensuring a successful repair. Always turn off the vehicle’s ignition and disconnect the negative battery terminal before working on any electrical components. Carefully identify each wire and its corresponding connector to avoid confusion during reassembly. Using dielectric grease on connectors can prevent corrosion and ensure a secure connection.
Ensure all connections are properly tightened to the specified torque values.
Typical Repair Costs and Time
The cost and time required for a Bank 2 Sensor 2 repair or replacement depend on several factors, including labor rates, parts costs, and the complexity of the repair. The table below provides a general estimate of typical repair costs and time.
| Component | Cost (USD) | Time (Hours) |
|---|---|---|
| Bank 2 Sensor 2 | $50-$150 | 0.5-1 |
| Labor (Diagnosis & Replacement) | $100-$300 | 1-3 |
| Special Tools (if needed) | $0-$50 | 0-0.5 |
| Total Estimated Cost | $150-$500 | 1.5-4.5 |
These estimates are approximations and may vary depending on the specific vehicle model, location, and labor rates. It is crucial to consult with a qualified mechanic for a precise quote.
Preventative Maintenance Tips

Proper preventative maintenance is crucial for extending the lifespan of the oxygen sensor, specifically the Bank 2 Sensor 2 in a Chevy Silverado. Neglecting these steps can lead to premature failure, increased repair costs, and potential engine performance issues. Regular checks and proactive maintenance can significantly reduce the risk of sensor malfunction.Regular inspection and cleaning, along with understanding environmental factors, are key elements in preventative maintenance.
These actions help maintain the sensor’s optimal operating condition and accuracy.
Importance of Regular Inspections and Cleaning
Regular inspections of the oxygen sensor are essential to detect early signs of damage or deterioration. This proactive approach allows for timely intervention and prevents more serious issues from developing. Cleaning the sensor, when necessary, removes contaminants that can interfere with its function, ensuring accurate readings and reliable performance. Routine checks can be performed without significant downtime.
Effects of Environmental Conditions, Chevy silverado bank 2 sensor 2
Environmental factors can significantly impact the performance and longevity of the oxygen sensor. Extreme temperatures, exposure to corrosive elements, and debris accumulation can all contribute to sensor failure. For example, prolonged exposure to high temperatures can degrade the sensor’s internal components, while moisture and road salt can corrode the sensor housing. Understanding the local environmental conditions and their impact on the sensor is crucial for developing a tailored preventative maintenance strategy.
Preventative Maintenance Checks
A comprehensive preventative maintenance schedule should include the following checks:
- Visual Inspection: Regularly inspect the sensor for any signs of physical damage, such as cracks, corrosion, or loose connections. Look for any signs of debris accumulation around the sensor. This simple step can help catch issues before they become more serious.
- Cleaning: Periodically clean the sensor’s housing and surrounding areas to remove any accumulated debris, dirt, or contaminants. This can be done with a suitable cleaning solution and a soft brush. Use care not to damage the sensor itself.
- Connection Integrity: Verify that the wiring and connections to the sensor are secure and free of damage. Loose connections can cause intermittent sensor readings and eventual failure. Inspect the electrical connectors for corrosion.
- Temperature Monitoring: Monitor the engine temperature. High temperatures can accelerate sensor degradation. Note any unusual fluctuations in engine temperature and address any potential underlying issues.
- Environmental Considerations: Be mindful of environmental conditions, particularly temperature extremes and exposure to corrosive elements. These conditions can significantly impact the sensor’s lifespan.
Troubleshooting Specific Scenarios
Troubleshooting Chevy Silverado Bank 2 Sensor 2 malfunctions requires a systematic approach. Identifying the specific symptoms and understanding potential causes is crucial for effective diagnosis and repair. This section details common scenarios and their corresponding solutions, providing a practical guide for resolving issues related to this crucial emissions sensor.Specific sensor malfunction scenarios often manifest with subtle yet telling symptoms.
A thorough understanding of these symptoms, combined with a methodical diagnostic procedure, can lead to a swift and accurate repair.
Sensor Output Fluctuations
Sensor output fluctuations, characterized by intermittent readings or erratic signals, can stem from several sources. Loose or corroded wiring, a faulty wiring harness, or a problem with the electrical connections to the sensor itself are frequent culprits. Inspecting and cleaning the wiring harness, checking for proper connections, and ensuring the sensor’s electrical integrity are vital steps. In cases of persistent issues, replacing the sensor itself might be necessary.
Sensor Resistance Readings
Resistance readings outside the manufacturer’s specifications can indicate a failing sensor. High resistance values suggest a potential internal component failure within the sensor, while low resistance values could point to a short circuit. A multimeter can be used to measure resistance, and the values should be compared against the specifications provided in the vehicle’s repair manual. If the resistance readings are inconsistent or significantly deviate from the expected range, the sensor should be replaced.
Sensor Malfunction Codes
Engine control module (ECM) diagnostic trouble codes (DTCs) provide valuable insights into the nature of the sensor malfunction. Specific codes often correspond to particular sensor issues. Referencing the vehicle’s diagnostic manual is crucial to understand the code’s meaning and the associated sensor failure. Common DTCs related to Bank 2 Sensor 2 might indicate issues with sensor output, wiring, or the sensor itself.
My Chevy Silverado’s Bank 2 Sensor 2 is acting up again. It’s driving me crazy, honestly. I’m seriously contemplating checking out the food truck scene tonight, perhaps at where are the food trucks tonight. Maybe a delicious plate of tacos will distract me from this frustrating engine issue. Fingers crossed, fixing this Bank 2 Sensor 2 problem is my top priority after this culinary adventure.
Clearing the code and re-evaluating sensor performance is a recommended step.
Table of Sensor Failure Scenarios and Solutions
| Sensor Failure | Possible Solution | Further Considerations |
|---|---|---|
| Intermittent sensor output readings | Inspect and clean wiring harness, check connections, ensure sensor electrical integrity. Replace sensor if issue persists. | Verify wiring harness for damage or corrosion. Ensure all connections are tight and secure. |
| High resistance readings | Verify resistance values against specifications. Replace the sensor if readings deviate significantly from expected range. | Check for signs of physical damage or internal component failure within the sensor. Inspect the sensor’s physical condition. |
| Low resistance readings | Inspect for short circuits. Replace the sensor if the short circuit is persistent. | Ensure all connections are secure and that there are no exposed wires. Confirm no short circuit exists in the wiring harness. |
| Specific DTCs related to sensor malfunction | Clear the DTC. Refer to the vehicle’s diagnostic manual for the code’s meaning. Replace the sensor if indicated by the code and troubleshooting. | Confirm the DTC is specific to the sensor. Perform additional diagnostics to isolate the exact problem. |
Advanced Troubleshooting and Diagnostics
Persistent issues with the Chevy Silverado Bank 2 Sensor 2 often require a deeper dive beyond basic diagnostic procedures. This section explores advanced techniques for isolating the root cause of malfunctions, focusing on the importance of electrical circuit analysis and the use of specialized diagnostic tools. Understanding these methods can significantly improve the accuracy and efficiency of repairs.Advanced diagnostic techniques are crucial when basic checks fail to identify the problem.
These approaches often involve more complex testing procedures and the use of specialized equipment to pinpoint the source of the issue, particularly when dealing with intermittent or erratic sensor readings. Proper understanding of the electrical circuits within the vehicle is paramount to effectively diagnose and resolve such complex cases.
Advanced Diagnostic Tools and Methods
Advanced diagnostic tools provide a deeper insight into the sensor’s behavior and electrical system. These tools include oscilloscopes, data loggers, and specialized scan tools capable of capturing real-time sensor data and analyzing electrical waveforms. Using these instruments allows technicians to observe the sensor’s output under varying conditions, revealing subtle patterns that may be missed with basic tests. A detailed analysis of the data obtained helps pinpoint the source of the issue, whether it’s a faulty sensor, wiring problem, or a malfunctioning component in the engine’s control module.
Evaluating Sensor Functionality with Advanced Techniques
Evaluating sensor functionality with advanced techniques involves more than just checking voltage readings. This includes observing the sensor’s response to changes in engine parameters. Advanced testing procedures often involve simulating various driving conditions or engine loads to stress-test the sensor and its circuitry. Analyzing the sensor’s output waveforms using an oscilloscope allows for a more precise assessment of the sensor’s performance and identification of any anomalies.
The use of specialized data loggers captures detailed data over extended periods, revealing intermittent or cyclical issues that may not be apparent during a single test. By combining data from various tests, technicians can gain a more comprehensive understanding of the sensor’s behavior and pinpoint the source of the problem with greater accuracy.
Importance of Understanding Electrical Circuits
A deep understanding of the electrical circuits related to the oxygen sensor is vital for effective diagnosis. The Bank 2 Sensor 2 is part of a complex network. Troubleshooting requires a thorough knowledge of how the sensor interacts with the engine control module (ECM), the wiring harness, and other related components. The electrical signals generated by the sensor, and the way these signals are processed by the ECM, are crucial in interpreting the sensor’s readings and identifying potential issues.
Understanding the wiring diagrams and electrical specifications of the specific vehicle model is essential to accurately pinpoint the location of faults within the circuit. Faults in the wiring harness or connections can mimic a faulty sensor, emphasizing the importance of thorough circuit analysis. For example, a poor connection at a sensor connector could lead to erratic readings, misleading a technician into believing the sensor itself is faulty.
Illustrative Examples of Sensor Functioning: Chevy Silverado Bank 2 Sensor 2
The oxygen sensor, specifically the Bank 2 Sensor 2 on a Chevy Silverado, plays a critical role in maintaining optimal engine performance and emissions. Understanding how this sensor operates under various conditions is vital for accurate diagnostics and effective troubleshooting. This section delves into the sensor’s output characteristics and their correlation with engine performance.The sensor’s output is a crucial piece of data for the Engine Control Unit (ECU).
Variations in the sensor’s output directly reflect the changes in the oxygen concentration in the exhaust stream. These changes are then interpreted by the ECU to adjust the fuel-air mixture for optimal combustion.
Sensor Output in Different Operating Conditions
The sensor’s output voltage varies significantly depending on the operating conditions of the engine. This output is directly related to the amount of oxygen present in the exhaust gas. Rich mixtures (excess fuel) result in lower oxygen levels, while lean mixtures (insufficient fuel) result in higher oxygen levels.
- At Idle: The sensor output typically fluctuates within a narrow range, reflecting the relatively stable combustion process. The output voltage might hover around 0.1 to 0.9 volts, depending on the specific engine and operating conditions.
- During Acceleration: As the engine load increases, the sensor output exhibits greater fluctuations. This is because the combustion process becomes more dynamic, leading to rapid changes in the oxygen concentration in the exhaust stream. The output voltage may range from 0.1 volts to greater than 0.9 volts, depending on the engine’s load and speed.
- During Steady-State Driving: Under constant speed and load conditions, the sensor output stabilizes to a specific voltage. This voltage corresponds to the oxygen content in the exhaust gas, and the ECU uses this stable output to fine-tune the fuel delivery for optimal efficiency and emissions.
Correlation of Sensor Data with Engine Performance
The sensor data is a key indicator of the engine’s combustion efficiency. The ECU uses this data to adjust the fuel injection system to maintain an optimal air-fuel ratio. Deviations from the expected output patterns often indicate a problem with the combustion process, fuel delivery, or the sensor itself.
- Stable Output: A stable output voltage signifies a well-regulated combustion process and a proper air-fuel ratio. This indicates the engine is operating within its optimal parameters, resulting in efficient combustion and minimal emissions.
- Unstable Output: An erratic or fluctuating output signal often points to a malfunction in the combustion process or the sensor itself. This can lead to poor fuel economy, increased emissions, and potentially engine performance issues.
- Constant High or Low Output: A consistently high or low output usually signifies a problem with the air-fuel mixture. This could stem from a faulty sensor, injector issue, or a problem with the engine’s overall functionality.
Sensor Output Used in the Engine Control Unit
The ECU employs the sensor’s output to fine-tune the fuel delivery system in real-time. The sensor readings are continuously monitored, and the ECU adjusts the fuel injection accordingly to maintain a near-stoichiometric air-fuel ratio. This real-time adjustment is crucial for efficient engine operation and reduced emissions.
Illustrative Graphs of Sensor Data
Visual representations of the sensor’s output under various conditions can aid in understanding its functioning. For example, a graph showing the sensor’s output during acceleration would display a more fluctuating pattern compared to the steady output at idle speed.
A graph showing a consistently high output voltage during steady-state driving could indicate a lean condition.
The graph would visually illustrate the correlation between the sensor output and the engine’s operating parameters, such as RPM and load.
Wrap-Up
In conclusion, diagnosing and resolving Chevy Silverado bank 2 sensor 2 issues requires a systematic approach. This guide provides a roadmap for understanding the sensor’s function, recognizing potential problems, implementing effective diagnostic procedures, and performing repairs or replacements. By understanding the importance of preventative maintenance and addressing specific troubleshooting scenarios, drivers can minimize the likelihood of future issues and ensure optimal engine performance.
Question & Answer Hub
What are the typical symptoms of a malfunctioning Chevy Silverado Bank 2 Sensor 2?
Symptoms can include rough idling, engine misfires, decreased power, check engine light illumination, and specific diagnostic trouble codes (e.g., P0135, P0136). The severity of symptoms can vary depending on the degree of sensor malfunction.
What are the most common causes of Bank 2 Sensor 2 failure?
Potential causes include sensor damage, wiring issues, environmental factors (extreme temperatures or contaminants), and internal sensor component wear.
How much does it typically cost to repair or replace a Chevy Silverado Bank 2 Sensor 2?
Repair costs vary depending on the specific repair needed, the labor rate in your area, and the availability of parts. A comprehensive cost breakdown is included in the guide’s repair section.
What are some preventative maintenance tips for extending the lifespan of the Bank 2 Sensor 2?
Regular inspections, cleaning of the sensor’s surroundings, and adhering to recommended maintenance schedules can significantly improve the longevity of the sensor.
